In homes around the world, vacuum cleaners have become a necessity. Cleaning machines are capable of removing all types of dust and debris from a home. Vacuum cleaners are an example of this.
It is their versatility, high performance, and ever-evolving technologies that make them an indispensable part of any household.
As we all know, it will eventually show signs of wear over time. Unfortunately, no vacuum cleaner can withstand the test of time. In general, leaks and tears on the hose are the most common problems that any vacuum will encounter.
It is inevitable that cracks and splits in the hose will result in leaks associated with premium vacuums, regardless of how hard the manufacturers try.
It does not matter how small or large a tear is, it will affect suction and overall performance of the vacuum system. The sooner these leaks are repaired, the better, as they say, better safe than sorry. Our topic for today is How to Fix a Leak in Your Vacuum Hose?
The following information is required
- Preventing health risks with a safety kit
- including a boxcutter or small knife
- for clearing obstructions
- Duct tape for sealing leaks
- A new vacuum hose handle or hull (depending on your model of vacuum)
- Torx screwdriver
Time Required
A person should be able to identify and correct leaks in a vacuum hose in approximately 10-15 minutes.
The steps to fix a leak in a vacuum hose
1. Determine the leak in the hose
Identifying the source of the leak is the first step. By running your finger through the hose you should be able to find the tear if it is a large tear, but if this is not the case, you may remove the hose and refill it with water.
Once the tube has been filled with water, hold it in a U-shape and locate the point from where it is leaking and mark the location. At this point, you need to patch the leak.
2. Locate the source of the leak
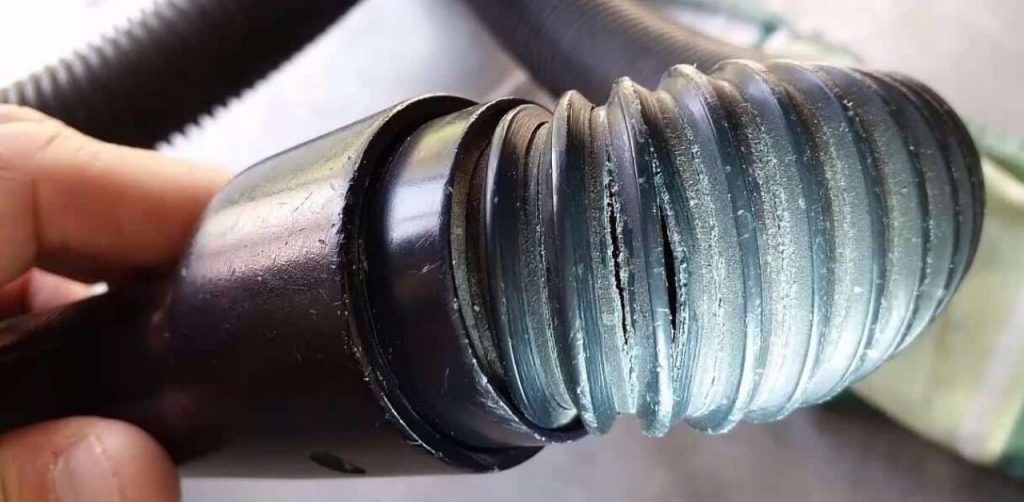
In order to locate the leak, you must determine whether it is near the end of the hose or not. It is possible that you have been blessed by the vacuum gods if the leak is near the end of the hose.
How can you fix this problem? It is all a matter of removing the damaged piece of the hose. For the purpose of removing the handle from the end, it would be easiest to cut straight through the slit.
Once the slit in the hose has been made, it is essential to remove the small piece of hose that is left inside the handle. It is necessary to press the tab with a screwdriver in order to release the hose and make the locking ring grip the handle.
Currently, the hose is attached to a hull, which will allow you to begin working on the next step of the repair.
Disconnect the remaining hose inside the hull by unscrewing it. The hull cannot be separated from the remaining hose if it is glued on.
In its place, you will need to discard it and purchase a new one to thread onto your hose. There may be instances in which this part is not glued and will simply thread off.
Reassembling the hose is the final step. As you place the locking ring on, thread the hole on your hose, which is a reverse thread. The handle should be clipped together once it has been threaded on all the way. The repair is now complete.
Nevertheless, what happens if the leak occurs in the middle of the hose? Using the steps below, you can easily and effectively fix leaks that are not near the end of the hose. Nevertheless, it will require more effort than the previous fix.
3. Remove any obstructions inside the hose
In order for your vacuum to function properly, you should clear the possible blockages in your hose either during maintenance or when fixing leaks. Before addressing the leak, you must first clear the vacuum hose and ensure that no large debris remains on the inner walls.
Push all the debris out of the hose with a thin long wire or a stick. As a result, you will be able to proceed with the other steps much more effortlessly.
4. Disinfect the affected area
If you have identified and marked the leak site, you should clean it with liquid soap to remove any dirt that is present there, and allow it to dry. As you are cleaning, ensure that no liquid soap gets into the vacuum, otherwise a new problem may arise.
5. Stretch the tube with a broom handle after it is removed
The hose can be stretched by simply removing the vacuum hose and inserting a broomstick through it. It should be easier to patch the slit after doing this.
Please make sure that you press and rub the area (where the slit is located) in order to make it completely flat before continuing to the next step. The reason why it is important to have a flat surface is that sealing is more effective on a smooth surface.
6. Tape the leak with duct tape
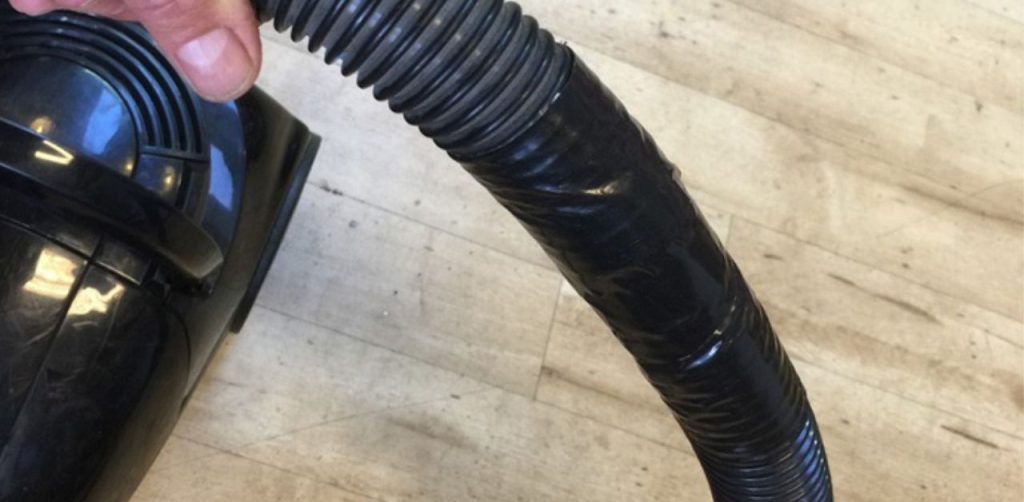
As long as the broomstick is still inserted inside the hose, cover the affected area with duct tape and gently press it to your heart’s content. Ensure that the slit has been sealed completely. If the leak is between two and three inches in diameter, do not use more than one layer of duct tape. It is recommended that if you are going to use more than one layer, you seal them together in an “X” pattern as it was found to be the most efficient.
7. Dispose of the broom handle
Once the leak has been sealed, the broom handle can be slowly removed from the hose. You should avoid bending or applying excessive force to the broom handle while sliding it out, as this may cause the seal to rip.
8. Assemble the hose again
After reassembling the hose to the vacuum, all that remains is to reconnect it. Your leak has been eliminated!
Note: The only problem that remains is that the sticky part of the duct tape is still visible inside the hose. Is there a way to resolve this issue? Don’t worry, you can easily resolve this by vacuuming up some flour or powder. It is sufficient to use a few tablespoons of regular flour or cornstarch.
Here are some tips for preventing vacuum hose leaks
You can avoid damaging your vacuum hose by following these fantastic tips.
- Don’t twist the hose excessively and make sure the vacuum is positioned correctly to avoid putting undue strain on the hose.
- Avoid vacuuming up hard objects.
- You should also regularly maintain your vacuum and hose.
FAQs
Where can I purchase a new vacuum hose?
If you wish to purchase a much more durable and premium vacuum hose, you will need to contact your vacuum provider directly. The manufacturer will provide the correct hose for your vacuum.
What are the signs that my vacuum has a leak?
It is safe to assume that if your vacuum is performing poorly, has an insufficient suction power, and makes a screeching noise when you vacuum, you have a leak in the vacuum hose.
What is the appropriate time to replace a vacuum hose?
How often you vacuum your home has a significant effect on the wear and tear on your vacuum hoses. If you vacuum frequently, the sooner the hose will wear. Nevertheless, vacuum hoses typically last for two to three years.


