The plugs of vacuum cleaners often fail due to the practice of removing the power cord from the wall socket before pulling the plug from the wall socket.
It is important to replace the plug-in when you experience intermittent power outages, sparks, or tripping of the circuit breaker when using a vacuum.
It may occur to you that replacing the vacuum power cord is a difficult and complicated process.
The purpose of this article is to provide you with information on how to replace the power cord on a Shark vacuum cleaner.
What is the procedure for replacing the power cord on a Shark vacuum? Instructions for replacing the power cord on a Shark vacuum
Step 1:
To prevent unpleasant consequences, unplug the vacuum cleaner from the power outlet.
There can be two or three pins on the vacuum cleaner plug, and your new plug must have the same number as the existing plug.
When you pull the power cord, these can reduce stress and prevent electrical connections from becoming loose.
Step 2:
It is necessary to disassemble the vacuum cleaner at some point in this process; the extent of disassembly will depend on the type of vacuum cleaner.
Remove the motor wiring from the vacuum. When replacing damaged wires, it is imperative that they are disconnected from the motor before they can be replaced.
- To better access the motor and power cord, remove the dust tank, filter, brush, roller, and other components.
- To access the power cord connector, remove all screws on the bottom cover.
- It is important to keep a record of where something went so that reassembly is made easier.
- When the cover is closed, another protective plate will hold the wires in place and require you to remove more screws.
- Before you do anything else, draw a simple diagram illustrating how the motor is connected to the wires.
- Detach the power cord from the motor and loosen the small screw.
- Clamp the wire farther away with your wire cutter.
- If the cord can be unplugged, it can be removed.
Step 3:
It is necessary to remove the drum and vacuum belt on certain types of vacuum cleaners in order to gain access to the motor.
As you disassemble the unit, be sure to examine the fasteners and the casing surrounding the power cord.
Step 4:
You should carefully examine how the wires and wires are connected to the motor before removing them.
The installation of replacement wires will be more successful if a simple wiring diagram is drawn.
You will also find that wires come in different styles, so be sure to look closely and verify that they are the same as the new wires.
Step 5:
Be sure to remember the orientation of these anchors and take extra precautions.
Usually, these retainers are transferred from the old power cord to the new power cord, so make sure you know how to properly install them.
It is not sufficient to remove the power cord of a vacuum cleaner by merely removing the electrical cord from the motor.
Usually, they are attached to one or more fixings, so be sure to remove them completely.
Step 6:
The old fixture must be moved in order to install a new vacuum power cord. Make certain they’re going in the proper way.
- For visual effects, place the doodle next to the vacuum cleaner.
- Align the wire on the new power cable with the motor wire.
- To keep the replacement wires in place, use the clips, clamps, and screws that were on the damaged cables.
- Remove an inch of insulation from the end of the power cord using a sharp knife to expose the wire. Make sure you don’t cut the cables.
- Connect the color-coded power cord to the appropriate motor cord with pliers.
- Replace the wire fasteners or clamps that were removed with the old wire.
- Reposition the motor wire to its original location.
- Connect the fasteners with the internal screws and tighten them.
- Ensure that the new power cord is installed in the same location as the old one.
- Install the shark vacuum cleaner’s bottom cover and all of the screws.
Step 7:
The motor wire should be connected to the power wire. The process is reversed in this case. The process of disassembly usually involves handling several small parts, such as cable ties.
A small amount of electrical tape is sufficient for connecting the wires together correctly. The motor area should be arranged before completing the process.
Step 8:
Locate the ground screw inside the new plug if you are installing a three-phase plug. This wire may be green in color and will connect to the center pin of the plug.
Loosen this screw, wind the wire around the screw in a clockwise direction, and then tighten the screw.
Remove any wires. It is recommended that no insulating layer protrudes under the screw, and no bare wires should protrude under the screw.
Step 9:
All screws should be tightened after reassembling the plug. You can now assemble the vacuum cleaner by replacing all of the removed parts.
FAQs
Is it possible to replace only the cord on a Shark vacuum?
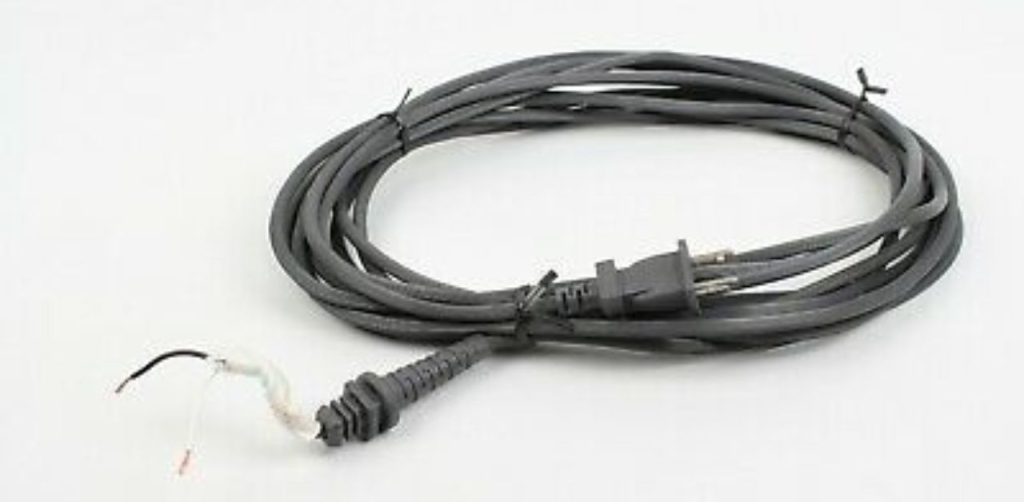
The entire vacuum vacuum cord must be removed if you are replacing the vacuum vacuum power cord, such as the power cord for the Shark Navigator.
On the Shark vacuum cleaner, where is the power button?
To vacuum bare floors, switch the power switch on the top of the vacuum cleaner to the I position.
Why is it so difficult to push my Shark vacuum?
The suction force may be too high if the vacuum is difficult to push. Ensure that the power button is positioned in the correct position on the corresponding surface.
To balance the airflow and reduce the level of suction, adjust the gray suction release ring counterclockwise.
What is the cause of the brush not spinning on my Shark vacuum?
There can be several reasons why the brush stops rotating, including a disengaged nozzle, debris on the brush, a broken belt, or an improperly installed roller brush switch.
It is possible for the brush roller to not rotate if the vacuum is set to floor mode.
In conclusion:
A shark vacuum cleaner’s power cord is easy to replace. The article in this section provides you with simple steps to follow if you do not know where to find a reputable Shark vacuum cleaner repair shop nearby.


